How To
Deploy the website#
Open the Dashboard;
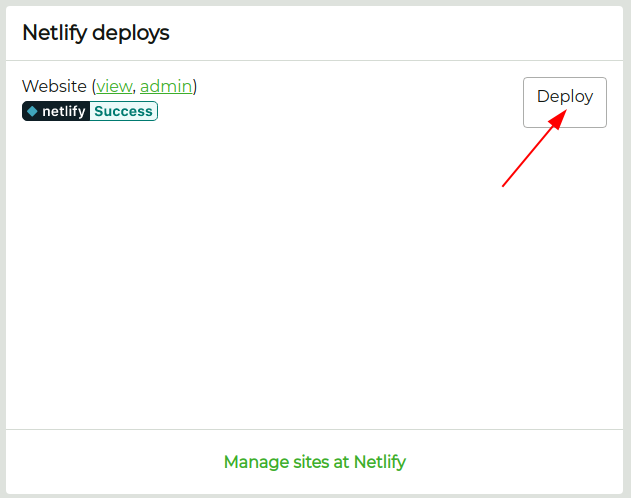
Scroll down until you find the Netlify Deploys card;
Click on Deploy;
- This action will trigger a build of the website which can take from 2 to 5 minutes. You can check the state of the build on the left: a yellow Building tag means it's still building, a green Success tag means the build has finished successfully and a red Failed tag means the build has failed (this isn't supposed to happen, so please contact the agency).
Create a document#
You can create documents in three ways.
Create a document from the Dashboard#
Open the Dashboard. This area contains several cards with the most common types of documents you might want to edit or create;
Click on the Create New button at the bottom of the card.
Create a document from the Navigation bar#
Use the button in the top navigation bar;
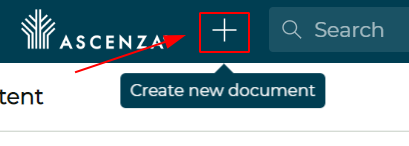
A list of documents will appear. Choose the one you want to create;

Create a new document from a Document List#
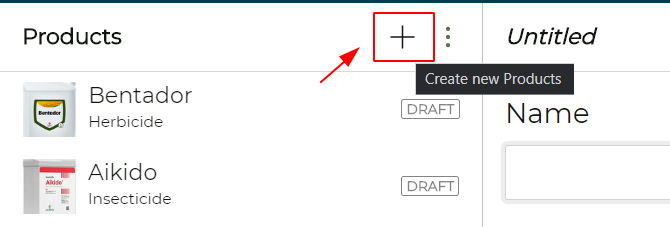
If you are already at a list of documents you can use the Icon at the top to create a new document of that type.
Delete a document#
Go to the document that you want to delete;
With that document selected, use the arrow at the bottom right side (next to the Publish button) and choose Delete;
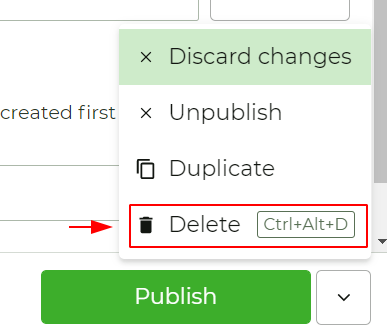
When a new window appears, click Delete Now to confirm the action;
tip
You can also just use the shortcut Ctrl + Alt + D.
Duplicate a document#
Go to the document that you want to duplicate;
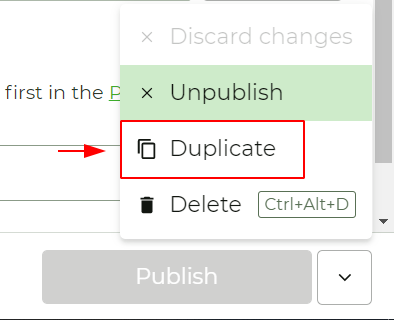
With that document selected, use the arrow at the bottom right side (next to the Publish button) and choose Duplicate;
Discard changes#
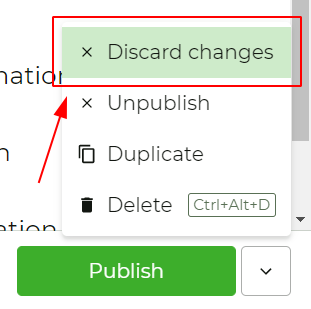
If your document has Draft changes that you want to discard, use the arrow at the bottom right side (next to the Publish button) and choose Discard Changes. It will revert to the last Published version.
Search for a document#
Use the search bar at the top bar navigation and simply type the name/title of the document you want to search for.
Sort documents#
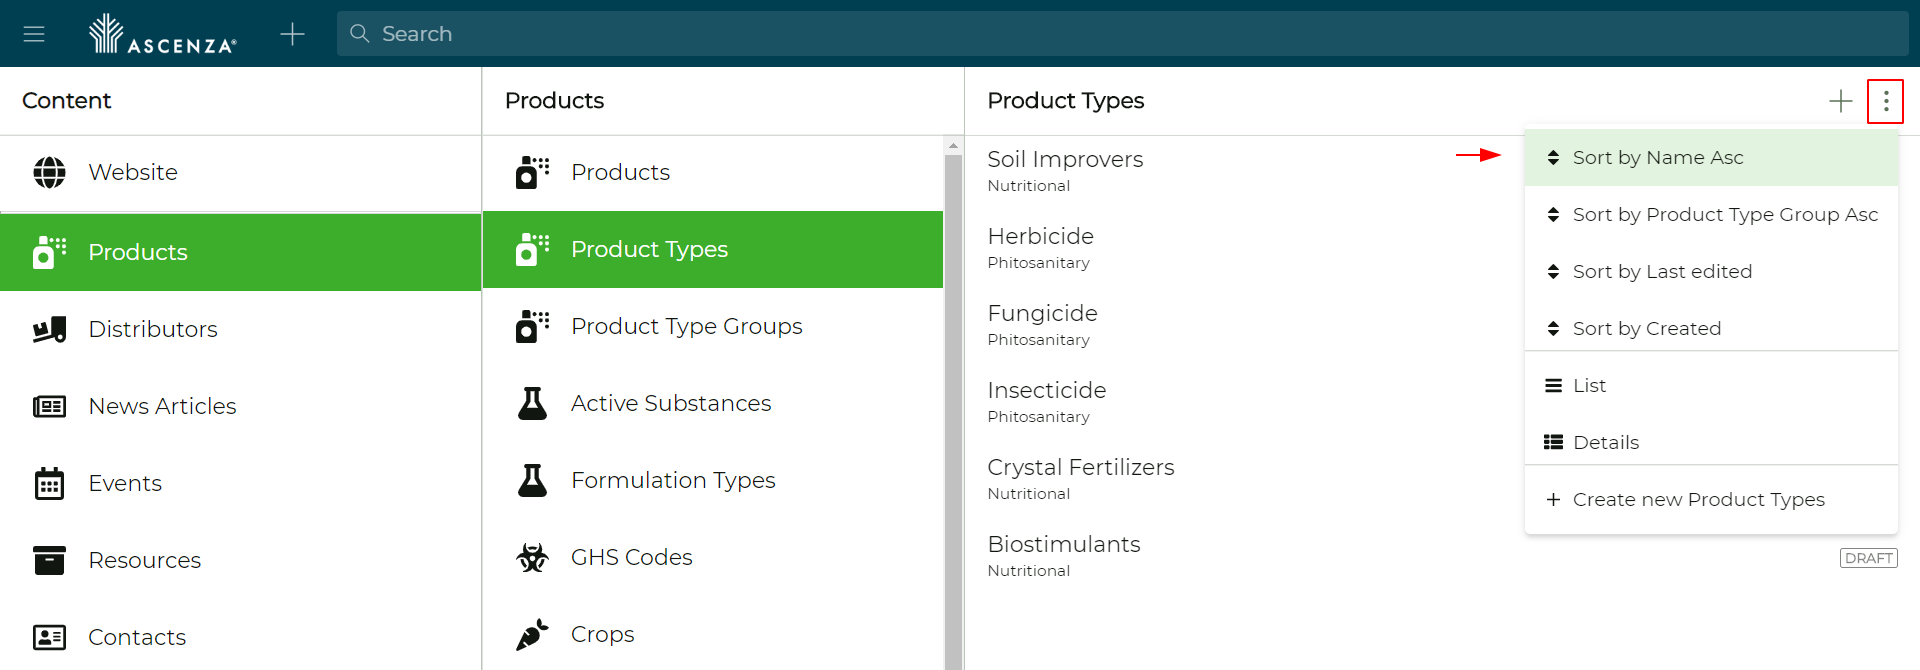
- Go to the document list you want to sort;
- Use the Menu Icon at the top right side of the page and choose how you want to sort your documents.
caution
There is currently a bug in Sanity that might prevent you from finding the documents you want when sorting. Please read more about it here.
Reorder Items in a list#
It's possible to sort a few types of items to appear in a specific order in your website. These items can be presented in two ways: in a card carousel or in a list.
Card Carousel#
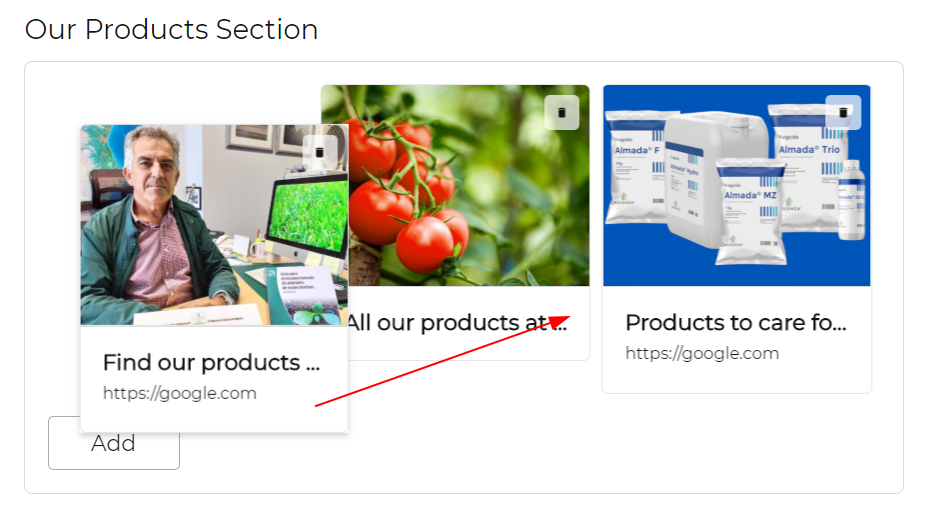
An example of a card carousel is the Our Products Section. To reorder, choose a card and simply drag it to the place it's supposed to be.
List of documents#
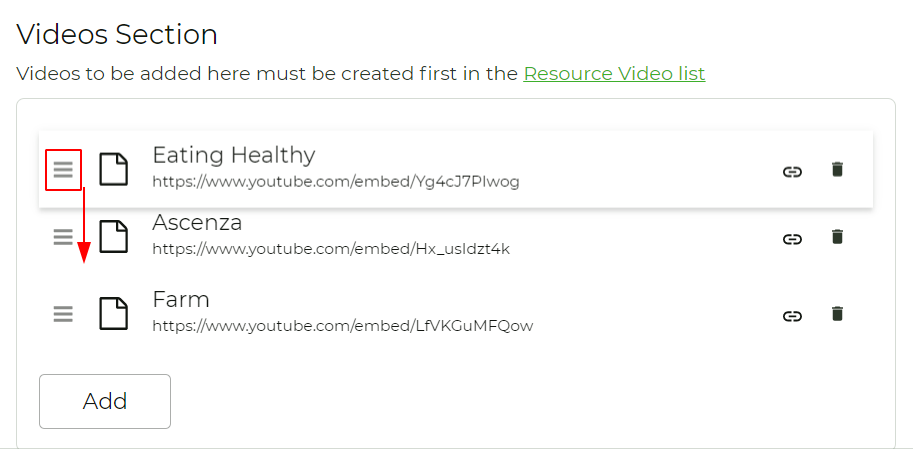
It is also possible to reorder an items list. Drag the item you want to move by using the Icon and drop it where you want it to be.
caution
Not all items that can be reordered in the backoffice will actually use that order when presented on the website. Some items have a fixed order of presentation on the website. It's the case of the Applications and Application Problems which will appear in alphabetical order.
Reuse an image that has already been uploaded#
Go to the document you want to add an image;
At the image field, choose the Select button (next to the Upload button);
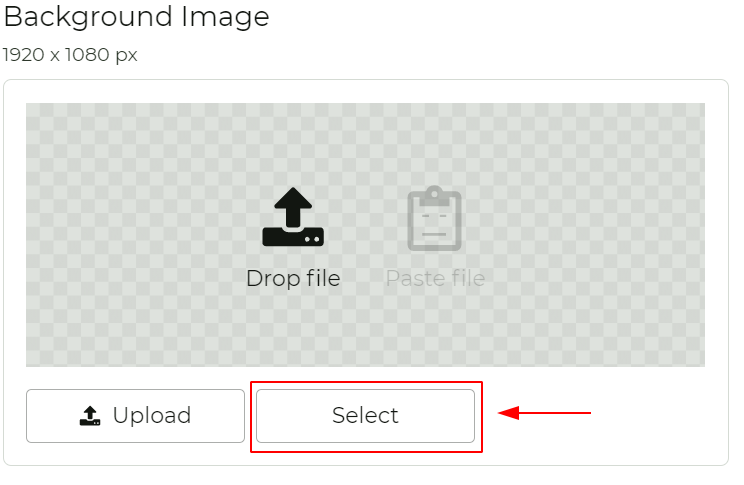
A list of images that have already been uploaded will open;
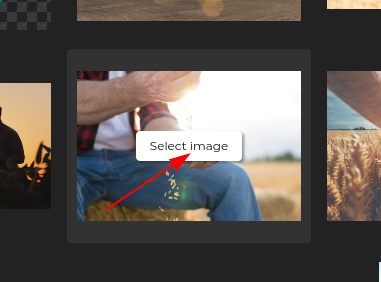
To choose one, simply click on the image one time and then click Select Image;
tip
You can sort this list by choosing one of the options in the top right corner of the page.
Hide a document from the website temporarily#
Go to the document that you want to hide temporarily;
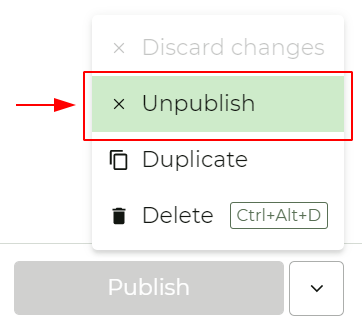
With that document selected, use the arrow at the bottom right side (next to the Publish button) and choose Unpublish.
Revert a document to a previous state#
Go to the document that you want revert to a previous state;
With that document selected, use the Menu Icon at the top right side of the page. Click on Browse History.
A timeline window will appear. Choose a date to see how the document was at that time;
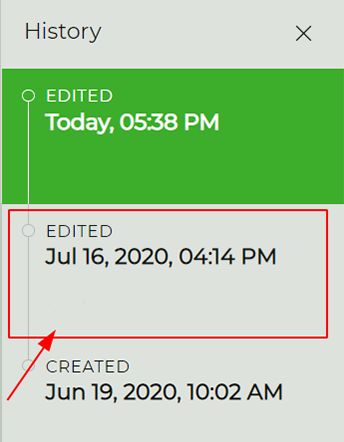
With that date selected, click on Restore in the bottom right corner of the page;

Recover a deleted document#
If you've accidentally deleted a document do not leave the page you are in.
Click on Empty, which you can find at the bottom left of the document page;
A timeline window will appear. Choose a date to restore the document like it was before;
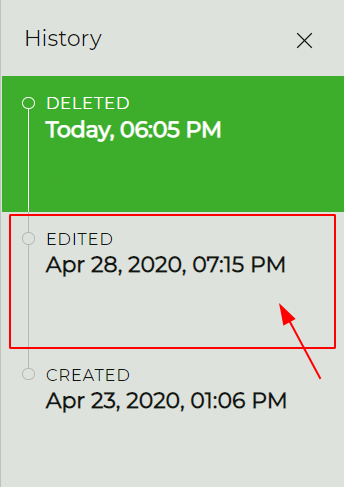
Click on Restore;

note
Normally, you should be able to restore the document by going to the Browse History, just like we do if we want to revert a document to a previous state. However, due to a Sanity bug this doesn't work at the moment. It has already been reported to the Sanity team and will hopefully be fixed soon.
Add a Certification to a Product#
Before you add a certification to a product, the certification must be created in Certifications. If the certification hasn't been created previously, here is how to create it now:
- Go to Desk → Products → Certifications;
- Click on the button at the top right side of the page and fill the fields;
- Publish the certification;
Once the certification is created, follow the next steps:
- Go to the product where you want to add the certification;
- Scroll down to the Caracteristics and open it;
- Scroll down until you find the Certifications field, click on Add and choose from the list of certifications available;
Add a brochure (or any other product file) to a product#
Before you add a brochure to a document, the brochure must be created in the Resources. If the brochure hasn't been created previously, here is how to create it now:
- Go to Desk → Resources → Files;
- Click on the button at the top right side of the page and fill the fields;
- Publish;
Once the Resource File is created, follow the next steps:
Go to the product that you want to add the brochure;
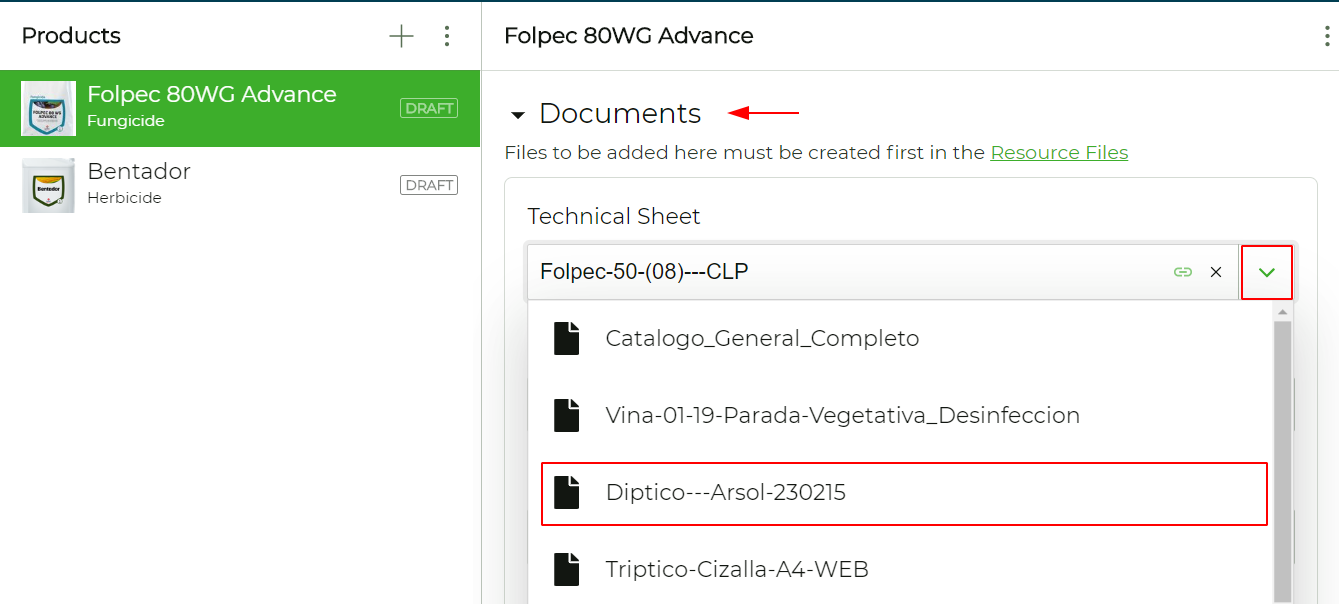
Scroll down until you find the Documents section and open it;
Click on the arrow on the right side of the field where you want to add the file;
Choose the file you want to add from the ones available;
Add a brochure (or any other file) to a resource files section#
Before you add a brochure to a document, the brochure must be created in the Resources. If the brochure hasn't been created previously, here is how to create it now:
- Go to Desk → Resources → Files;
- Click on the button at the top right side of the page and fill the fields;
- Publish;
Once the Resource File is created, follow the next steps:
- Go to Website → Resources Page;
- Choose a File Section from those already created, or create a new one;
- Click on Add and select the file you want;
- Click on Publish;
Add an event to the homepage and news page#
Before you add an event to the homepage and the news page, the event must be created in Events. If the event hasn't been created previously, here is how to create it now:
- Go to Desk → Events;
- Click on the button at the top right side of the page and fill the fields;
- Publish the event;
Once the Event is created, follow the next steps:
Go to Desk → Website → Homepage;
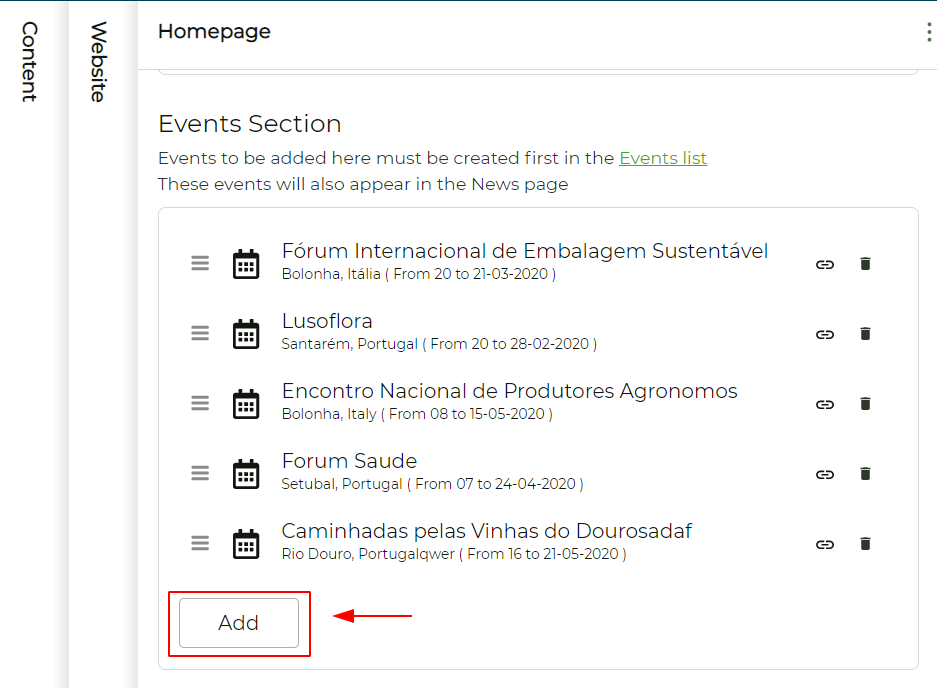
Scroll down to the Events Section;
Click on Add and choose from the list of events available;
note
Keep in mind that although you're in the Homepage, the Events you add here will also appear in the News Page.
Add a link to the resources#
- Go to Desk → Resources → Links;
- Click on the button at the top right side of the page and fill the fields;
- Publish;
Add the social network links that appear on the footer#
Go to Desk → Website → Metadata;
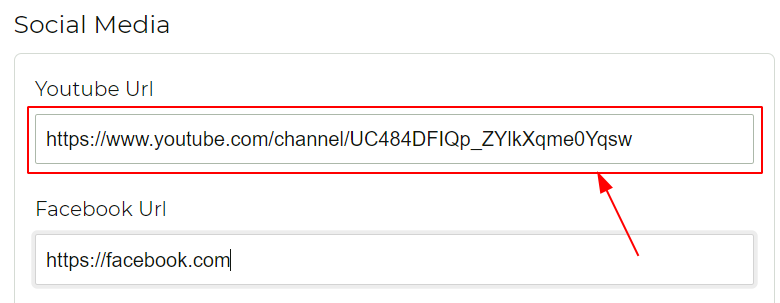
Scroll down to the Social Media section;
Add the relevant urls;
Click on Publish;
Activate the newsletter multi-step form#
In order to activate the 2nd and 3rd steps of the newsletter multi-step form, and to make sure the data from those steps gets stored in MailChimp, you must follow the steps below:
Go to your website's Mailchimp account;
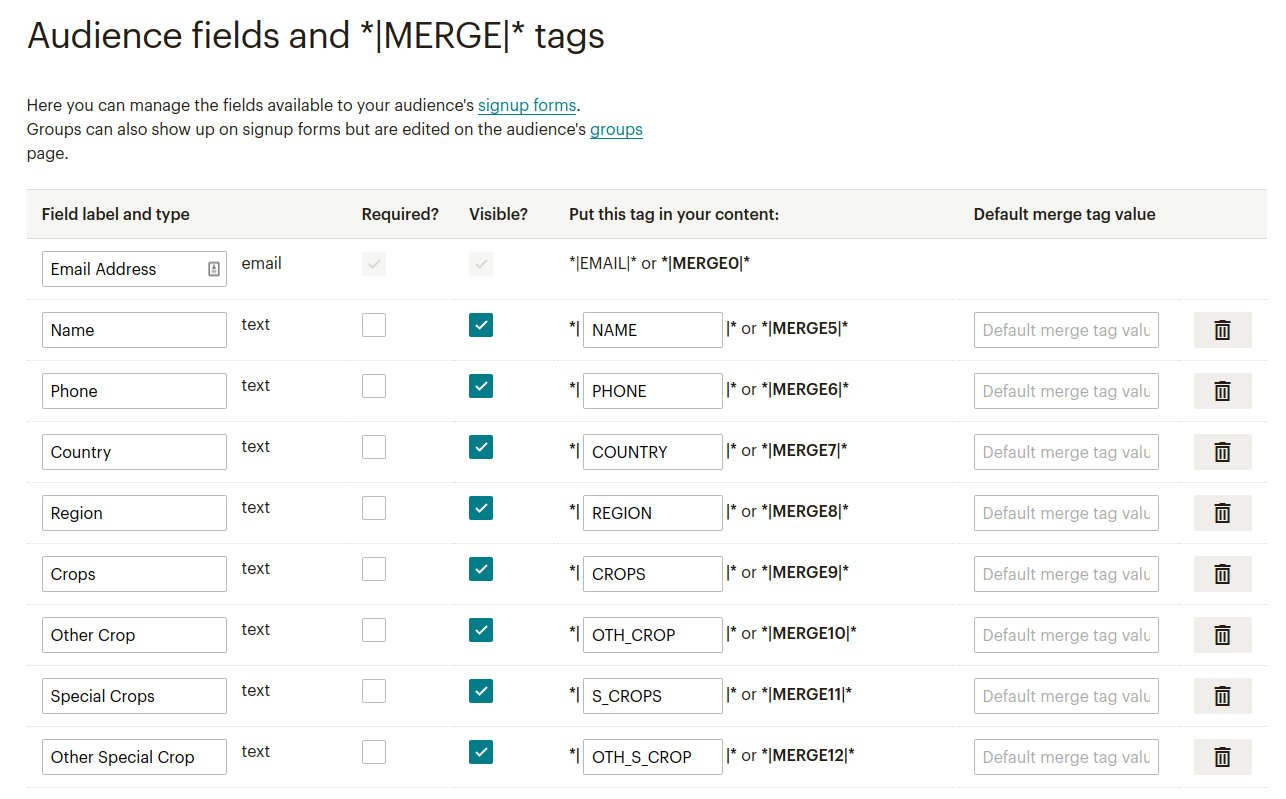
Go to your audience → Settings → Audience fields and *|MERGE|* tags;
Add the following text fields, with the respective tags (see image below):
- Name: NAME
- Phone: PHONE
- Country: COUNTRY
- Region: REGION
- Crops: CROPS
- Other Crop: OTH_CROP
- Special Crops: S_CROPS
- Other Special Crop: OTH_S_CROP
Go to the backoffice, and go to Website → Homepage and activate the option
Newsletter with Multi Step Form;Note that in order for the 3rd step of the form to show you need to also add crops in
Newsletter Form Cropslists;Publish;